

 These bunnies were created from an internet search of "felt bunnies." I came across lots of ideas, some included sewing machines, or needle felting; things I did not want to do. So I reinvented the felt bunny and used felted wool, the blanket stitch and cotton ball tails. Simply cut out two pieces of felted wool in bunny shape, then use embroidery thread to make little eyes. Then, blanket stitch around the two pieces put together, starting below the bunnies tummy at the bottom corner. Stitch up until about a half inch up the ears, then separate the ears and continue up the side of just ONE ear. When you get back around that ear to the same spot that you separated at, cross over- and go up the other side of the OTHERe
 ar, so when you get back around you will put the pieces back together and continuedown the bunny closing the felt together. The ears should sit kind of floppy. Then, stitch on the tail, and fill your bunny with batting (or and easter egg...)
Even Jack, the french bull dog had a good time.
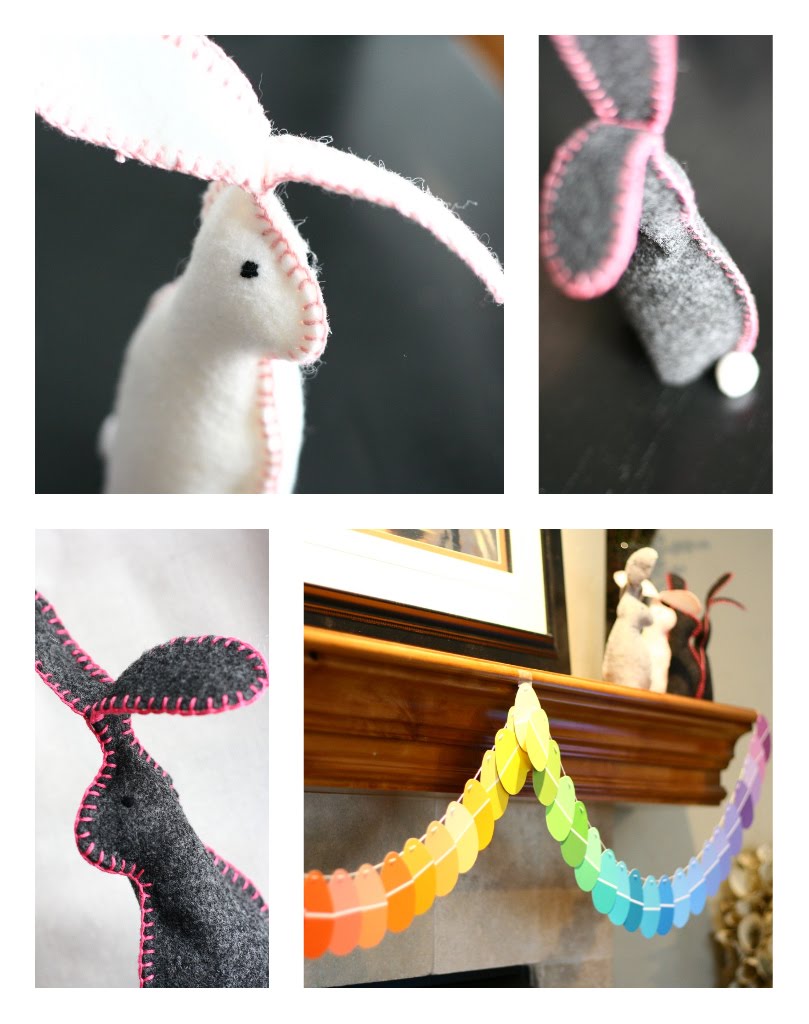
(They sit gathered together, above my easter egg garland, found here)
Supplies:
Felted Wool
Fabric Scissors
Embroidery Thread
Cotton ball tails
Batting
Needle..

